
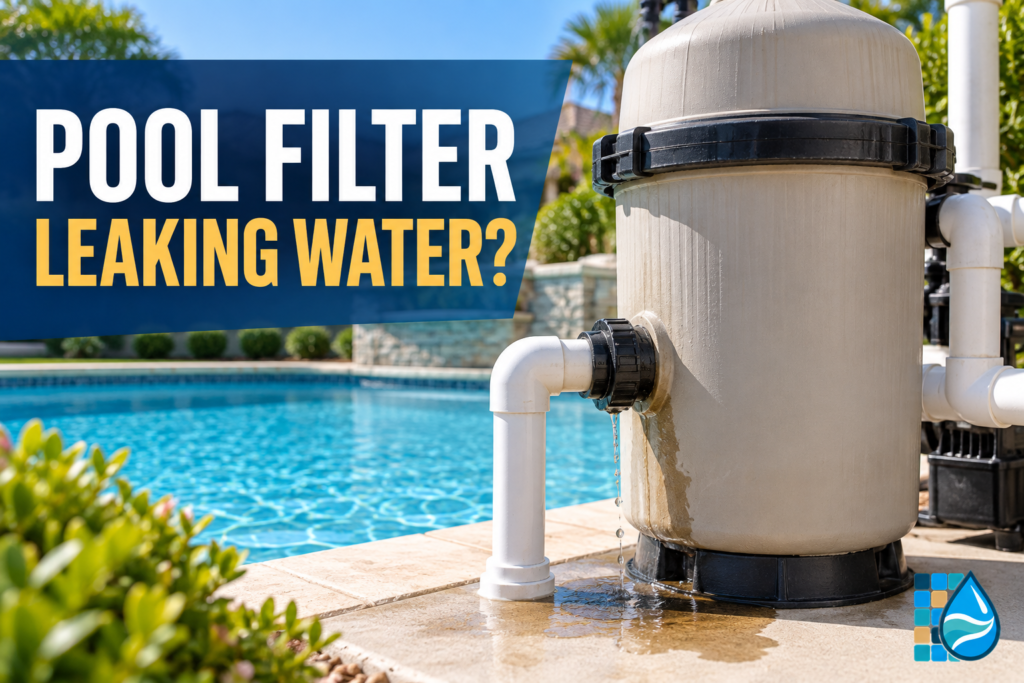
Pool filter leaking water? Trace the first wet point before you tighten or replace anything. Water can travel down a filter tank, along a pipe, or across an equipment pad, so the middle of the puddle is rarely the best clue. Dry the equipment, observe from a safe distance, and note whether the leak begins only when the pump runs or continues after shutdown.
A filter is a pressure vessel. Never loosen, remove, adjust, or tighten a clamp, lock ring, lid, union, drain plug, pressure gauge, air-relief assembly, or valve while the system is running or pressurized.
Safety first: Shut off the pump, disable schedules and freeze protection, and turn off power as the installed equipment manual directs. Open the manual air-relief valve, stand clear, and wait until air and water stop escaping and the pressure gauge reads zero. If the gauge will not return to zero, the tank or clamp is cracked or distorted, water is near electrical equipment, or the shutdown procedure is uncertain, keep the system off and call a qualified pool professional.
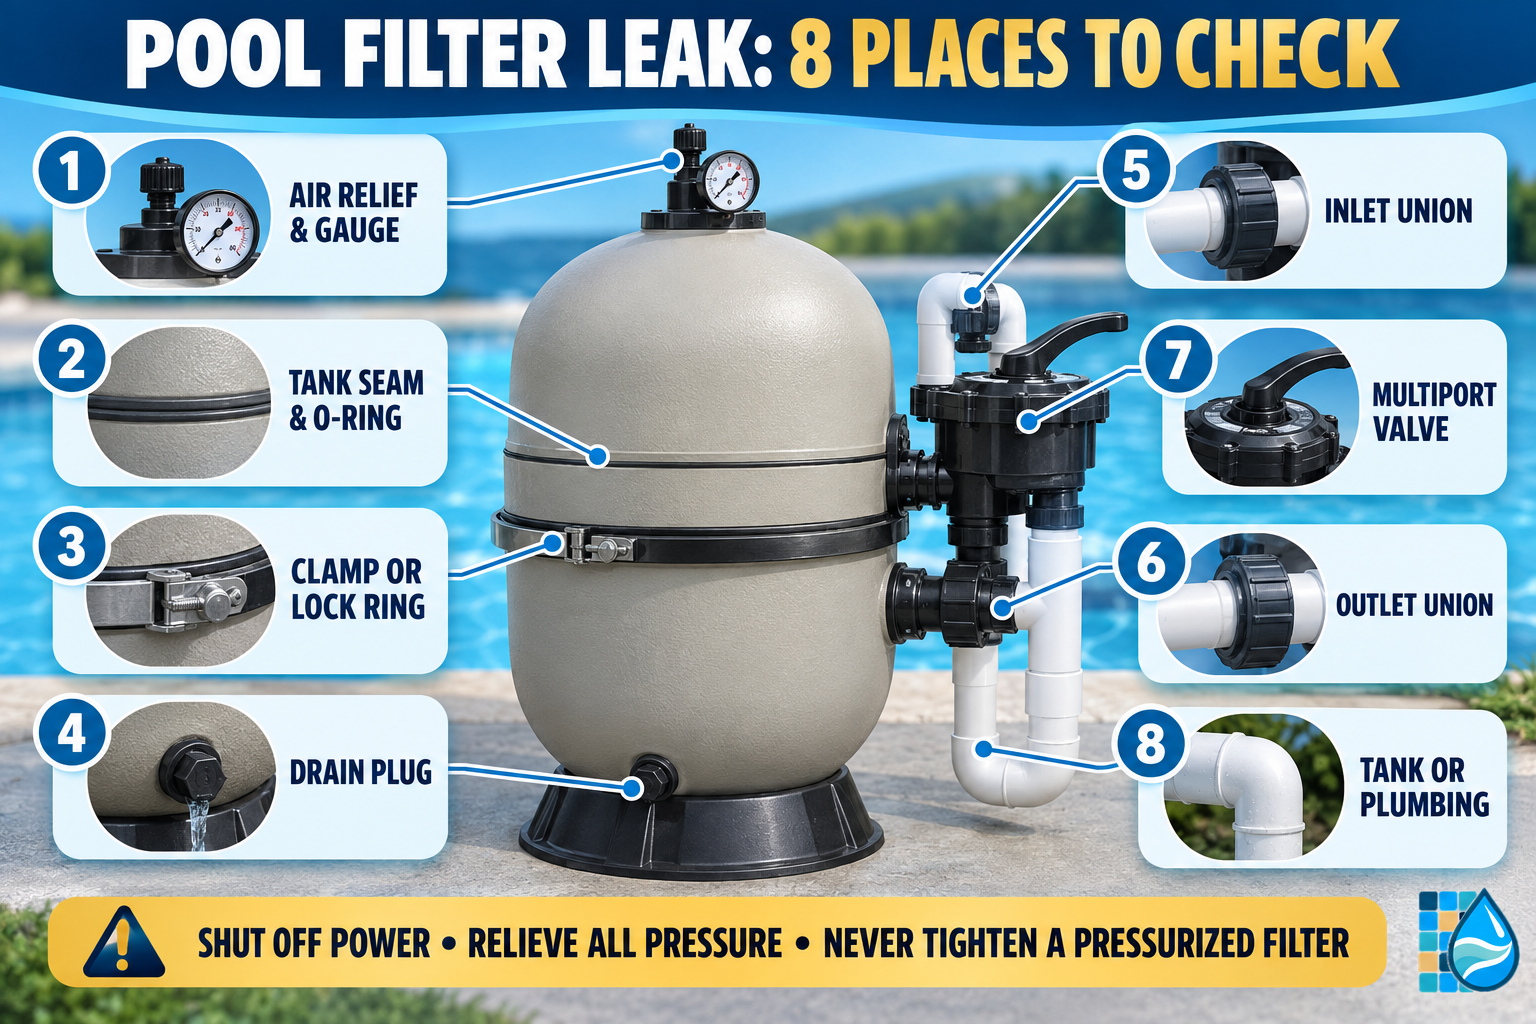
Pool filter leaking water? Start with these eight checks
- Inspect the manual air relief and pressure gauge from a safe distance.
- Look for the first wet point at the tank seam and O-ring area.
- Examine the clamp or lock ring without adjusting it under pressure.
- Check the drain plug and its seal after full depressurization.
- Trace the inlet union and nearby plumbing.
- Trace the outlet union and pressure-side plumbing.
- Inspect the multiport or backwash valve on sand and D.E. systems.
- Stop for a cracked tank, damaged pressure parts, glued-plumbing leak, or unknown source.
First identify when the leak appears
Leak timing helps separate a filter leak from a pump, plumbing, condensation, or rainwater problem.
| What you observe | More likely direction | Safe next move |
|---|---|---|
| Drip begins only after the pump starts | Pressure-side filter fitting, seam, valve, union, or glued joint | Observe from a distance, then shut down and depressurize |
| Water continues with the pump off | Gravity drainage on equipment below pool level, a low fitting, or water already trapped on the pad | Isolate only as the plumbing design and manual allow; watch the highest wet point |
| Fine spray or pulsing leak | Pressurized fitting, crack, or damaged seal | Shut the system off immediately; do not approach to tighten it |
| Water starts at the top and runs down the tank | Air-relief, gauge, lid, or upper seal | Dry the top first and recheck after a safe restart |
| Puddle forms near the pump rather than the filter | Pump lid, drain plug, housing, seal, or nearby plumbing | Use the pool-pump leak guide |
| Pool level drops but the equipment pad stays dry | Pool shell, fittings, underground plumbing, evaporation, or intermittent equipment leak | Use the pool-leak troubleshooting guide |
Do not search for a leak with your hands around running equipment. A small stream can be hard to see, and pressurized water can suddenly change direction. Use your eyes, a flashlight, and a dry paper towel only after the system is fully shut down and depressurized.
1. Air-relief valve and pressure gauge
Water at the top of the filter often travels down the tank and makes the seam, clamp, or lower plumbing look guilty. Start with the manual air-relief valve, pressure gauge, and the fittings that connect them to the lid or tank.
Common clues include:
- moisture around the air-relief stem or body;
- droplets below the gauge threads or gauge face;
- a cloudy, cracked, or water-filled gauge lens;
- a gauge that does not return to zero after safe depressurization;
- a leak that begins as soon as the filter purges air during startup.
Do not remove the gauge or air-relief assembly while the filter is pressurized. These are safety components, not ordinary plumbing accessories. Use only the exact parts and service method specified for the filter model. If the assembly is cracked, incomplete, or will not operate correctly, keep the pump off until it is replaced or serviced.
2. Tank seam and O-ring
A wet band around the joint between the upper and lower tank sections can point to debris on a sealing surface, a dry, twisted, swollen, pinched, cracked, or incorrectly sized O-ring, an improperly seated lid, or a damaged tank.
Do not assume the fix is “make the clamp tighter.” First shut down, isolate the equipment if required, open the manual air relief, drain the tank as the manual directs, and confirm zero pressure. Then follow the exact model manual for disassembly and inspection. Some filters use a band clamp; others use a threaded lock ring or a model-specific locking system.
If homeowner service is allowed by the manual, clean the O-ring groove and mating surfaces, inspect the seal in bright light, and replace a damaged seal with the exact specified part. Use only manufacturer-approved lubricant, and only where the manual calls for it. Petroleum jelly and general-purpose grease can swell or damage some seals.
Never reuse a clamp, lock ring, lid, or tank part that is cracked, bent, corroded, stripped, distorted, or missing hardware. Those are pressure-containing components and belong with a qualified professional or the manufacturer’s authorized service channel.
3. Clamp or lock ring
Water near the clamp may come from the tank O-ring, the lid seating, the air-relief assembly above it, or the clamp system itself. Dry the top of the tank and work downward so runoff does not create a false diagnosis.
With the system off and fully depressurized, look for:
- an uneven gap between tank sections;
- a clamp that is not seated uniformly;
- a missing, incorrect, or damaged nut, spring, washer, latch, or locking feature;
- rust, cracks, deformation, stripped threads, or evidence of a previous improvised repair;
- an O-ring protruding from the seam.
Do not tap, pry, tighten, or reposition the clamp while pressure remains. Do not substitute generic hardware. Clamp procedures and torque requirements vary by filter and production date, so the installed manual and exact model number control the repair.
4. Drain plug and drain O-ring
The filter drain sits low, so water from almost anywhere can collect around it. Dry the tank above the drain before blaming the plug. If the drain itself is the first wet point, possible causes include a missing or damaged O-ring, grit on the sealing surface, cross-threading, a cracked plug, a damaged drain port, or an incompatible replacement part.
After full shutdown and depressurization, inspect the plug and seal only as the manual allows. Do not wrap, glue, or overtighten a drain plug in an attempt to repair a damaged tank port. Plastic threads can crack, and many drain plugs seal with an O-ring rather than thread tape. Use the exact plug and seal for the model.
If the equipment is below the pool waterline, closing the correct isolation valves may be necessary to stop gravity flow. Do not guess at valve positions. Label the system first, and never create a closed return path for the next startup.
5. Inlet union
The filter inlet carries water from the pump into the filter. A leak here may come from a union O-ring, a misaligned pipe, a loose union, a cracked tailpiece, a glued joint, or stress from unsupported plumbing.
Dry the union and the pipe above it, then observe where moisture first returns. After shutdown and zero pressure, check for visible misalignment, a pinched or missing O-ring, a dirty sealing face, or a cracked fitting. A union seals at its O-ring or gasket; tightening the nut harder does not repair a damaged seal or crooked plumbing.
If the plumbing must be forced sideways to meet the filter, stop. That stress can damage the union or tank connection. Glued PVC repairs and pipe support are best handled by someone who can restore alignment without loading the filter body.
6. Outlet union
The outlet carries filtered water toward the heater, sanitizer, returns, or water features. The same union checks apply, but the pressure and downstream configuration can change with pump speed and valve position.
Record the pump speed and normal valve positions when the leak appears. If pressure is also unusually high or return flow is weak, a downstream restriction may be increasing stress at a marginal seal. Use the high-filter-pressure checklist before repeatedly replacing O-rings.
Do not run the pump against a closed return valve. Do not use the union as a lever to align rigid plumbing. Replace damaged seals or fittings with model-compatible parts and correct the alignment that caused the failure.
7. Multiport or backwash valve
Sand and many D.E. systems use a multiport, push-pull, or backwash valve. An external leak can appear around the valve cover, handle shaft, body seam, unions, threaded ports, or glued plumbing. Water leaking from the waste line while the valve is in Filter is a different symptom and may point to an internal valve seal or diverter problem.
Turn the pump off before moving any multiport valve. The pool multiport valve positions guide explains the normal functions. Never use Closed as a running position.
Valve designs differ, and internal springs can be under tension. If the body is cracked, the handle will not seat, water escapes continuously to waste, or the correct rebuild procedure is unknown, arrange professional service. A leaking valve may be repairable without replacing the entire filter, but it must be identified by exact model.
8. Tank, base, and connected plumbing
A cracked tank, damaged bulkhead, separated fitting, or split glued pipe is not an O-ring problem. Look for a hairline crack that opens under pressure, a white stress mark in plastic, a bulge, a distorted lid, a leak from a molded port, or plumbing that moves when the pump starts.
Keep the system off if any pressure-containing part is cracked or distorted. Do not patch a filter tank with epoxy, plastic weld, tape, a hose clamp, or a homemade brace. A cosmetic-looking crack can propagate under pressure, and a repaired surface does not restore the original rating.
Leaks at glued PVC joints, heaters, salt cells, chlorinators, and underground lines can imitate a filter leak. The pool-equipment glossary can help name each component before service is scheduled.
Does the filter type change the diagnosis?
Yes. The leak-tracing method is similar, but the likely parts differ.
- Cartridge filter: check the air-relief/gauge assembly, tank O-ring, clamp or lock ring, drain, and inlet/outlet unions. Use the cartridge-filter cleaning guide only after correct shutdown and depressurization.
- Sand filter: also inspect the top- or side-mount multiport valve, valve-to-tank connection, drain assembly, and laterals only if symptoms justify internal service. A leaking tank or molded neck is a stop condition.
- D.E. filter: inspect the same pressure components and backwash valve. Follow the exact D.E. recharge procedure after any internal service, and use appropriate respiratory protection when handling dry D.E. powder.
For the differences among all three filter types, see How to Clean a Pool Filter.
Repair the leak or replace the filter?
A model-specific O-ring, drain plug, union seal, gauge, or air-relief assembly may be a straightforward repair when the tank and locking system are sound. Replacement becomes more likely when:
- the tank, lid, molded port, clamp, or lock ring is cracked or distorted;
- required safety parts are obsolete or unavailable;
- repeated leaks show that the sealing surfaces no longer mate correctly;
- the filter is undersized, improperly plumbed, or repeatedly operated above its limits;
- multiple repairs approach the cost of a correctly sized replacement;
- the manufacturer or a qualified professional says the pressure vessel is not serviceable.
Do not choose a replacement by tank size alone. It must match the pump flow, plumbing, heater, sanitizer, pool volume, debris load, and local code requirements.
Common mistakes that make a filter leak worse
- Tightening a clamp, lock ring, union, gauge, or drain plug while the system is running.
- Assuming the center of the puddle is the source.
- Replacing an O-ring without cleaning and inspecting both sealing surfaces.
- Using the wrong lubricant, thread sealant, or generic hardware.
- Overtightening plastic threads or union nuts.
- Forcing misaligned plumbing into place.
- Restarting before the clamp and air-relief procedure is verified.
- Moving a multiport valve with the pump running.
- Patching a cracked pressure vessel.
- Ignoring abnormal pressure, trapped air, or a gauge that will not return to zero.
Frequently asked questions
Can I run my pool pump if the filter is leaking?
Shut the system down if the leak is active, pressurized, near electrical equipment, coming from the tank or clamp, or not clearly identified. A minor drip from a replaceable external seal may still worsen quickly. Find the source and follow the installed manual before returning the system to service.
Why is my pool filter leaking from the middle?
The tank O-ring, lid seating, or clamp system may be involved, but water from the air relief or gauge can also run down to the seam. Dry the filter from the top down and identify the first wet point. Never adjust the clamp while the filter is pressurized.
Why does the filter leak only when the pump is on?
The filter and outlet plumbing are under pressure while the pump runs, so a marginal O-ring, union, valve, fitting, or crack may leak only then. A fine spray or leak from a pressure-containing part is a reason to shut down immediately.
Why does the filter keep dripping after shutdown?
Water can drain from the tank and nearby plumbing after the pump stops. Equipment below the pool waterline may also receive gravity flow unless correctly isolated. Watch the highest wet point and confirm the system’s valve layout before changing anything.
Can I tighten the filter clamp to stop the leak?
Never tighten or adjust a filter clamp under pressure. After full shutdown and depressurization, follow the exact manual. A seam leak may require cleaning or replacing the tank O-ring, correcting lid seating, or replacing damaged pressure parts—not simply more clamp force.
Can I use petroleum jelly on a pool-filter O-ring?
Use only the lubricant approved by the filter manufacturer. Petroleum-based products and incompatible greases can swell or damage some elastomers. Some seals require a specific silicone lubricant; others have different instructions.
Is a leaking filter causing my pool to lose water?
It can, especially if the leak runs for hours each day or continues by gravity after shutdown. Mark the pool level, measure the equipment-pad evidence, and use the pool-leak checklist to separate an equipment leak from evaporation or a pool-shell/plumbing leak.
The bottom line
When a pool filter is leaking water, find the first wet point and record when the leak appears. Start at the air relief and gauge, then work down through the tank seam, clamp, drain, unions, valve, and plumbing. Shut off power and relieve all pressure before touching any part. If the tank or clamp is damaged, the gauge will not return to zero, water reaches electrical equipment, or the source remains uncertain, keep the system off and call a qualified pool professional.
Chris Barnes is a former pool-service company owner with more than seven years of residential and commercial pool-service experience. Swimming Pool Resource turns field experience and current manufacturer guidance into practical steps homeowners can use to troubleshoot, service, and maintain their pools.
Need help identifying the first wet point? Ask Chris about your pool and include one wide photo of the equipment pad plus a close-up taken with the system safely off.
References
- Pentair: Clean & Clear Plus Cartridge Filter Installation and User’s Guide
- Pentair: Pool Filter Product Safety & Help Center
- Jandy: CL/CV Cartridge Pool Filters Installation & Operation Manual
- Jandy: D.E. Pool Filters Installation & Operation Manual
- Pentair: System 2 PLM Series Modular Media Filter Owner’s Manual