
By Chris Barnes · Former pool-service company owner · 7+ years of residential and commercial experience
To find a pool pump model number or filter model, start with the manufacturer label on the complete equipment—not a random number molded into a lid, basket, motor, clamp, or replacement cartridge. Turn the equipment off, photograph the entire pad, then capture each visible label straight on. Record the brand, complete model, serial number, part or catalog number, voltage, pressure rating, plumbing size, and any suffixes before ordering a part or downloading a manual.
Safety first: Turn off power before reaching around equipment or moving anything for a photograph. Do not remove an electrical-panel cover, motor cover, heater panel, pump lid, filter clamp, or filter lid just to find a label. Never open a pressurized filter. If a label is inside a compartment that requires tools or exposes wiring, gas components, hot surfaces, or pressurized parts, use the manual or a qualified professional.
Pool Pump Model Number: The Quick Answer
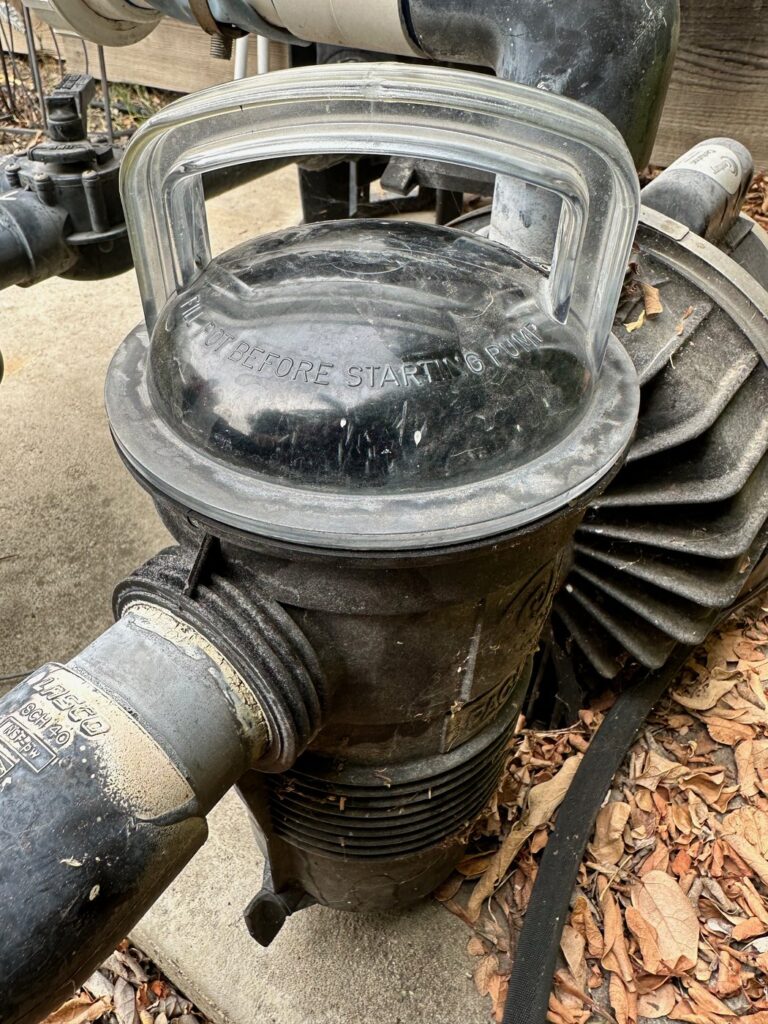
Look first on the pump’s wet end—the housing with the clear strainer lid—or near the discharge pipe. Photograph the pump label and the motor label separately. The motor’s horsepower or frame information does not necessarily identify the pump housing, impeller, diffuser, seals, lid, basket, or unions.
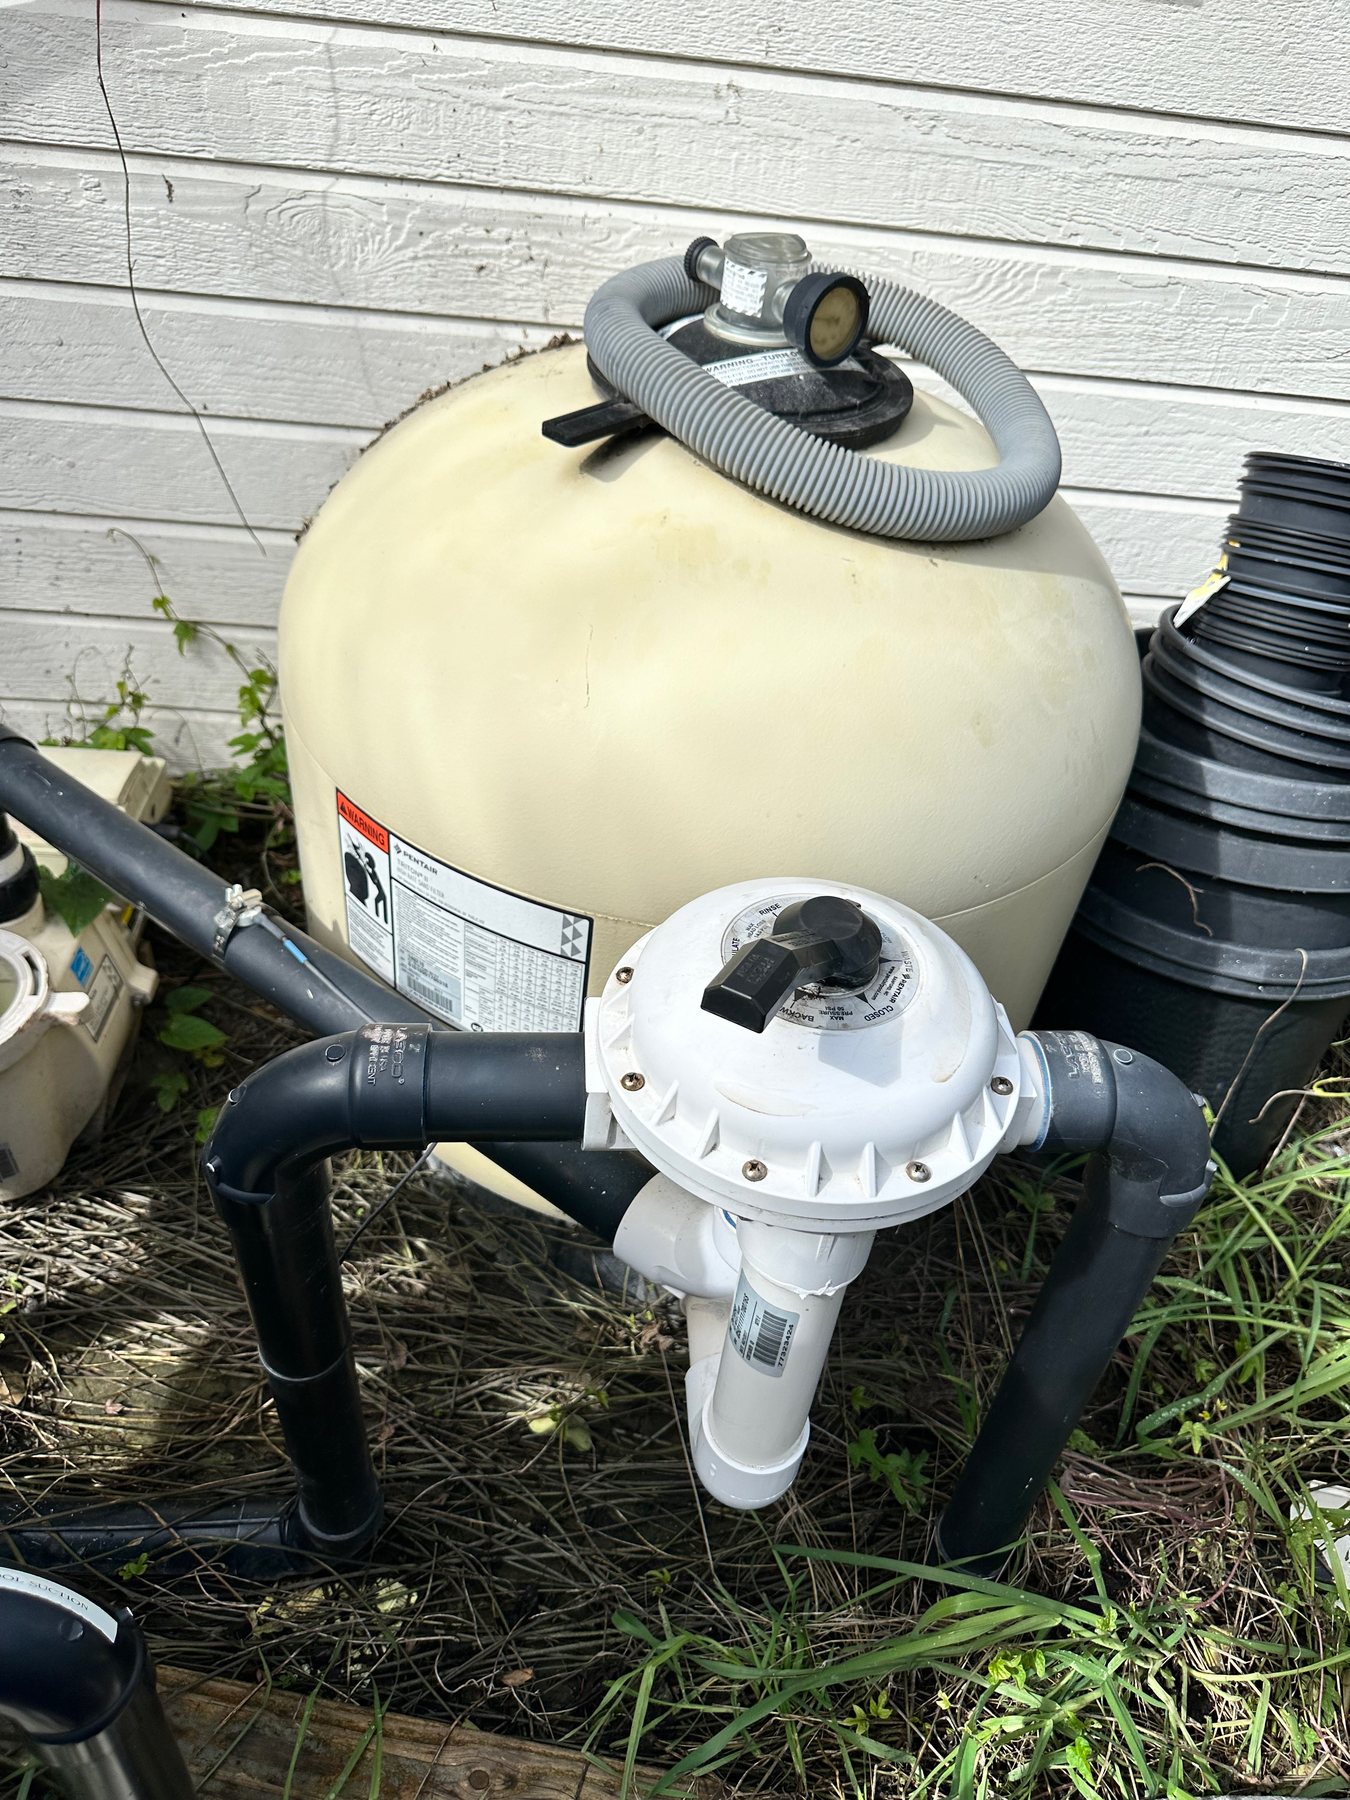
For a filter, look for a label on the tank body, front, base, or band area without loosening the clamp. Record the filter family, complete model and serial number, maximum working pressure, and tank size. A cartridge or grid number identifies the removable media; it may not identify the filter tank that contains it.
Why the Exact Equipment Model Matters
Pool equipment families often look nearly identical while using different seals, lids, unions, cartridges, grids, laterals, valves, circuit boards, sensors, and plumbing sizes. A partial name such as “Pentair pump” or “Jandy filter” is rarely enough to choose a safe replacement part.
- Correct parts: small model suffixes can change a seal kit, diffuser, drive, or internal assembly.
- Correct manual: startup, pressure, wiring, winterizing, and service instructions belong to the exact product family.
- Warranty and age: a serial number may help the manufacturer find production or registration records.
- Better troubleshooting: photos of the full system show how components are connected and which valve or accessory belongs to which unit.
- Fewer returns: confirming the model before measuring or ordering avoids guessing from appearance alone.
How to Identify Pool Equipment in 8 Steps
1. Make the Equipment Pad Safe
Turn the system off before reaching behind pipes, wiping a label, or placing a phone near moving or hot equipment. Let a heater cool. Keep hands dry and stay outside electrical enclosures. Do not loosen a pump lid, filter clamp, gauge, air-relief valve, drain plug, union, or plumbing fitting for identification.
2. Photograph the Entire Equipment Pad
Take one wide photo that includes the pump, filter, heater, sanitizer, valves, automation, and visible plumbing. Then take a second photo from the opposite side if access is safe. The wide view preserves the relationships that closeups remove.
Photograph valve positions before touching them. A label closeup may identify a component, but the full-pad image helps explain which pipe is suction, which is return, and where the component sits in the water path.
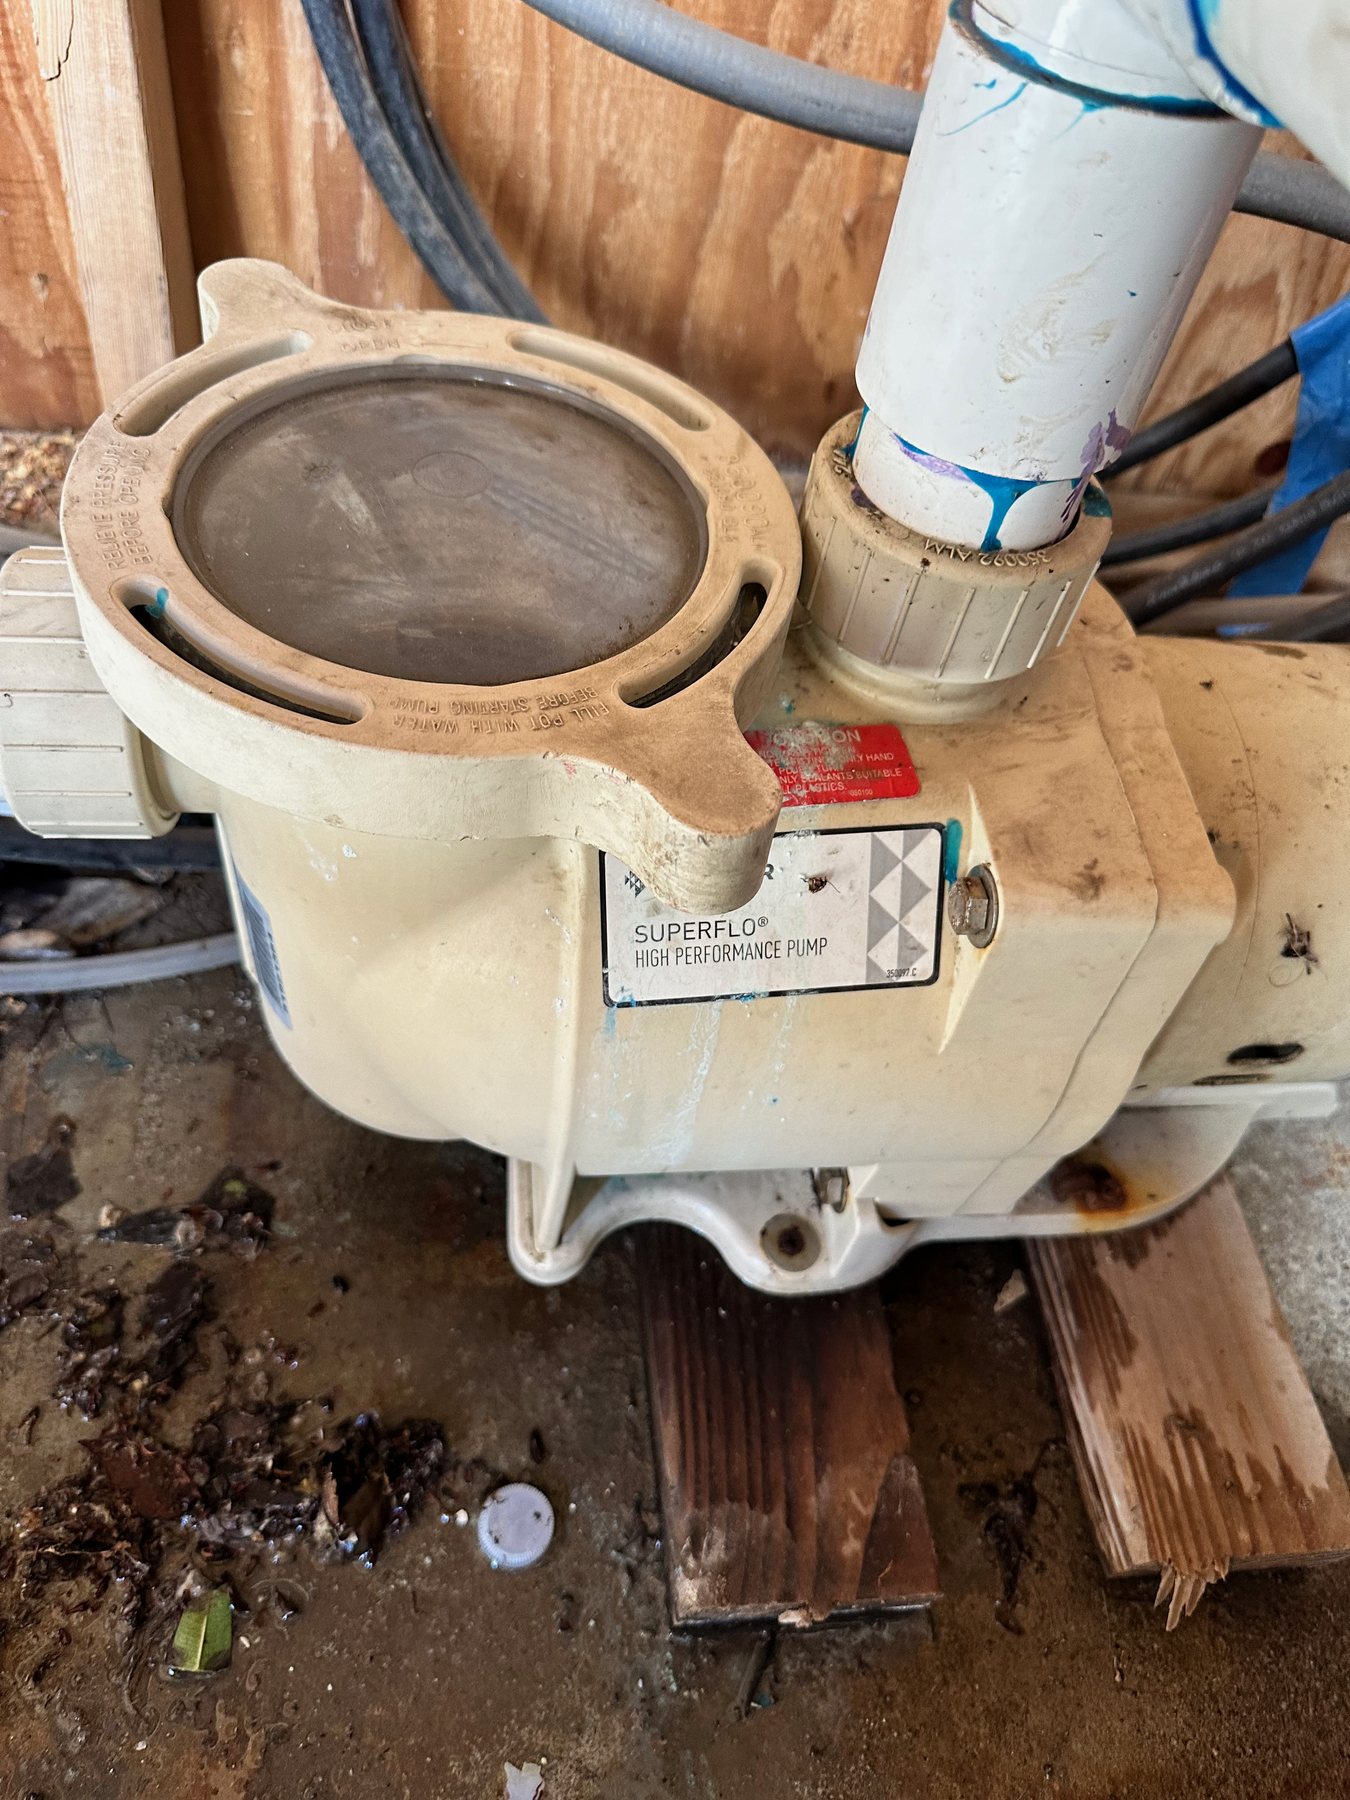
3. Find the Pump-Housing Label
Check the wet end near the clear lid, the pump base, and the area near the outlet pipe. Pentair’s serial-number guide says its pool-pump serial label is commonly on the wet end, with some Sta-Rite labels also on the base. Jandy directs owners to a pump label near the outlet pipe and specifically warns not to use the motor-label number as the pump serial number.
Capture the complete model and every suffix. If the label lists an item, catalog, or part number, record that too. Do not rely on lid shape or paint color; housings can be repainted and lids can be replaced.
4. Photograph the Motor or Drive Separately
A single-speed motor label may list voltage, amps, horsepower, service factor, frame, and its own model or catalog number. A variable-speed pump may have a drive label or screen information. These details matter when replacing the motor or drive, but they do not automatically identify all wet-end parts.
Label your notes “pump housing” and “motor/drive” so the two identities are not mixed. A pump housing may outlast a motor and end up paired with a replacement that is newer than the rest of the assembly.
5. Find the Filter-Tank Label
Look around the tank body, front, base, or band area while the system is off. Photograph the entire filter, then the label. Capture the filter family, complete model, serial number, pressure rating, tank size, and any readable manufacturing data.
Identify whether the system is cartridge, sand, or D.E. without opening it. External clues include a multiport valve, push-pull valve, backwash plumbing, tank shape, and manufacturer markings—but the label and manual are the controlling evidence.
6. Record the Valve and Plumbing Details
A replacement filter part or valve may depend on port size, valve model, orientation, and connection type. Photograph the multiport or push-pull valve, its label, the plumbing entering and leaving the filter, and the waste or backwash line.
Never move a multiport valve while the pump is running. Do not remove a valve, union, gauge, or clamp to read a hidden number.
7. Match the Label to an Official Manual
Search the manufacturer’s support site using the full model or catalog number. Compare the product photo, port layout, dimensions, specifications, and parts diagram with the installed unit. Use the revision of the manual that matches the equipment family and production period when the manufacturer provides that distinction.
Do not download a manual solely because the product name looks close. Confirm at least two independent details—such as the full model number plus port layout or tank dimensions—before treating it as a match.
8. Confirm Before Ordering or Opening Equipment
Compare the exact part description, compatible model list, dimensions, and revision notes. Ask the manufacturer or a qualified supplier to verify compatibility when the label is damaged or the equipment has been modified.
Before opening a pump or filter, follow its shutdown and pressure-relief instructions. If the job involves electrical wiring, gas, combustion, structural damage, a pressurized tank, or a label you cannot verify, stop and use a qualified professional.
Model Number vs. Serial Number vs. Part Number
| Number | What it usually identifies | How to use it | Common mistake |
|---|---|---|---|
| Model number | Product family, size, configuration, or performance version | Find manuals and compatible parts | Dropping a suffix that changes the exact version |
| Serial number | One individual unit or production record | Warranty, registration, age, and manufacturer support | Using a motor serial number for the pump housing |
| Part or catalog number | A sellable assembly or component | Cross-check a replacement or product variant | Assuming a molded component number identifies the whole unit |
| Motor model or frame | The installed motor or drive | Motor-specific electrical and replacement research | Treating it as the complete pump model |
Manufacturers format these fields differently. Record the label exactly as printed, including dashes, spaces, leading zeros, and letter suffixes. A clear photo is often more reliable than a handwritten transcription.
The Five Photos to Take Before Asking for Help
- Entire equipment pad: pump, filter, valves, heater, sanitizer, and visible plumbing.
- Pump housing label: straight, sharp, and close enough to read every field.
- Motor or drive label: captured separately from the pump housing.
- Filter label and full tank: include the clamp, valve, gauge, and plumbing orientation without opening the tank.
- Problem area: the leak, error display, broken part, unusual plumbing, or symptom—plus a wider context photo.
Use good daylight or a work light without glare. Wipe only the outside of an accessible label with the equipment off. Take multiple angles instead of moving energized, hot, heavy, or pressurized components. Avoid including house numbers, addresses, faces, vehicle plates, or other identifying details.
What If the Equipment Label Is Missing or Unreadable?
- Check the base and opposite sides with power off and safe access.
- Look for installation invoices, warranty records, owner’s manuals, or old service photos.
- Record visible dimensions, pipe size, port arrangement, lid style, valve model, and distinctive housing details.
- Photograph every molded number, but label it as an unconfirmed component number.
- Ask the manufacturer or an experienced supplier to compare the evidence.
- Do not order a safety-critical, electrical, gas, pressure-containing, or fit-sensitive part from appearance alone.
A motor or cartridge number can narrow the possibilities, but it may not prove the pump or filter model. If two models share the same external shell, the internal parts or rating may still differ.
Pool Equipment Identification: Common Questions
Is the number on my pool-pump motor the pump model number?
Not necessarily. The motor and wet end are separate assemblies and can be replaced at different times. Record both labels. Use the pump-housing identity for wet-end parts and the motor or drive identity for motor-specific research.
Can the cartridge number identify my filter?
It can provide a clue, but it is not conclusive. One cartridge may fit several filters, and an aftermarket element may carry a different numbering system. Confirm the filter-tank label, tank dimensions, and official compatibility list.
Where is a pool-filter serial number usually located?
Location varies by brand and model. Jandy’s current help page shows filter serial information on a label at the front of the filter; other manufacturers may use the tank body, base, or another accessible surface. Use the manufacturer’s serial-number locator when available.
What information should I send when a pool pump is leaking?
Send the full-pad photo, pump-housing label, motor or drive label, a closeup of the wet area, and a wider view showing whether water appears near the lid, unions, drain plugs, housing seam, shaft area, or plumbing. The pool-pump leak guide explains the common locations.
The Bottom Line
The right pool pump model number or filter identity turns a vague equipment problem into a specific, researchable one. Photograph the complete system, keep the pump housing and motor labels separate, capture the filter and valve details, and confirm the match against an official manual before ordering.
Once the equipment is identified, use the pool-equipment glossary to map the water path, visit the pool troubleshooting hub, or send the five-photo set through Ask Chris.
Sources and Review Notes
Written and field-reviewed by Chris Barnes. Former Northern California pool-service company owner with more than seven years of residential and commercial experience. Last reviewed September 10, 2026. Equipment labels, current manufacturer records, and the manual for the exact installed model take priority.