
By Chris Barnes · Former pool-service company owner · 7+ years of residential and commercial experience
Is my pool leaking—or is the falling water level normal evaporation? The most useful first step is not guessing at a universal evaporation rate. Compare the pool with a bucket exposed to the same weather, then inspect the equipment, skimmer, plumbing, shell, and waterline for patterns. Heat, wind, low humidity, splash-out, water features, filter cleaning, and an automatic fill can all disguise what is really happening.
Safety first: Keep swimmers away from the bucket-test setup. Never run a pump without adequate water, open pressurized equipment, reach into energized equipment, or drain a pool to look for a leak. Follow the manuals for the installed equipment and call a qualified professional for electrical, underground-plumbing, structural, or concealed leaks.
Is My Pool Leaking? The Quick Answer
If you are wondering “is my pool leaking?”, run a controlled bucket test during a calm, rain-free 24-hour period. Disable the automatic fill, stop water features and cleaners, and mark both water levels. If the pool drops more than the bucket, a leak is more likely. Then use the stopping level, pump-on versus pump-off pattern, air bubbles, wet areas, and visible drips as clues—not as proof of one exact failure.
The U.S. Environmental Protection Agency (EPA) notes that pool water can be lost through evaporation, cleaning, leaks, and splashing. Its residential pool guide describes the bucket test and flags unusually large weekly losses, wet spots, and air in the pump strainer or return line as reasons to investigate.
Evaporation vs. a Pool Leak
Evaporation changes with air temperature, water temperature, humidity, wind, sun exposure, pool-cover use, and whether a water feature is running. That is why a rule such as “every pool loses the same number of inches per week” can mislead homeowners. A covered pool on a calm, humid week will behave differently from a warm uncovered pool in dry wind.
If “is my pool leaking?” is the question, a same-weather bucket comparison is more reliable than guessing from a generic weekly average.
EPA WaterSense says a properly used solid pool cover can prevent up to 95 percent of evaporation. If water loss drops dramatically when a suitable cover is used, evaporation may be a large part of the problem. During extreme weather, also review the heat-wave pool checklist.
| What you observe | What it may suggest | What to check next |
|---|---|---|
| Pool and bucket fall by about the same amount | Evaporation is the main measured loss | Weather, cover use, water temperature, splash-out, and water features |
| Pool falls more than the bucket | A leak is more likely | Equipment pad, skimmer, shell, fittings, plumbing, autofill, and overflow |
| Loss is greater while the pump runs | Possible pressure-side or equipment leak | Return plumbing, filter, heater, valves, unions, waste line, and visible pad leaks |
| Loss continues or increases with the pump off | Possible shell, skimmer, fitting, suction-side, or static leak | Stopping level, cracks, penetrations, wet ground, and professional pressure testing |
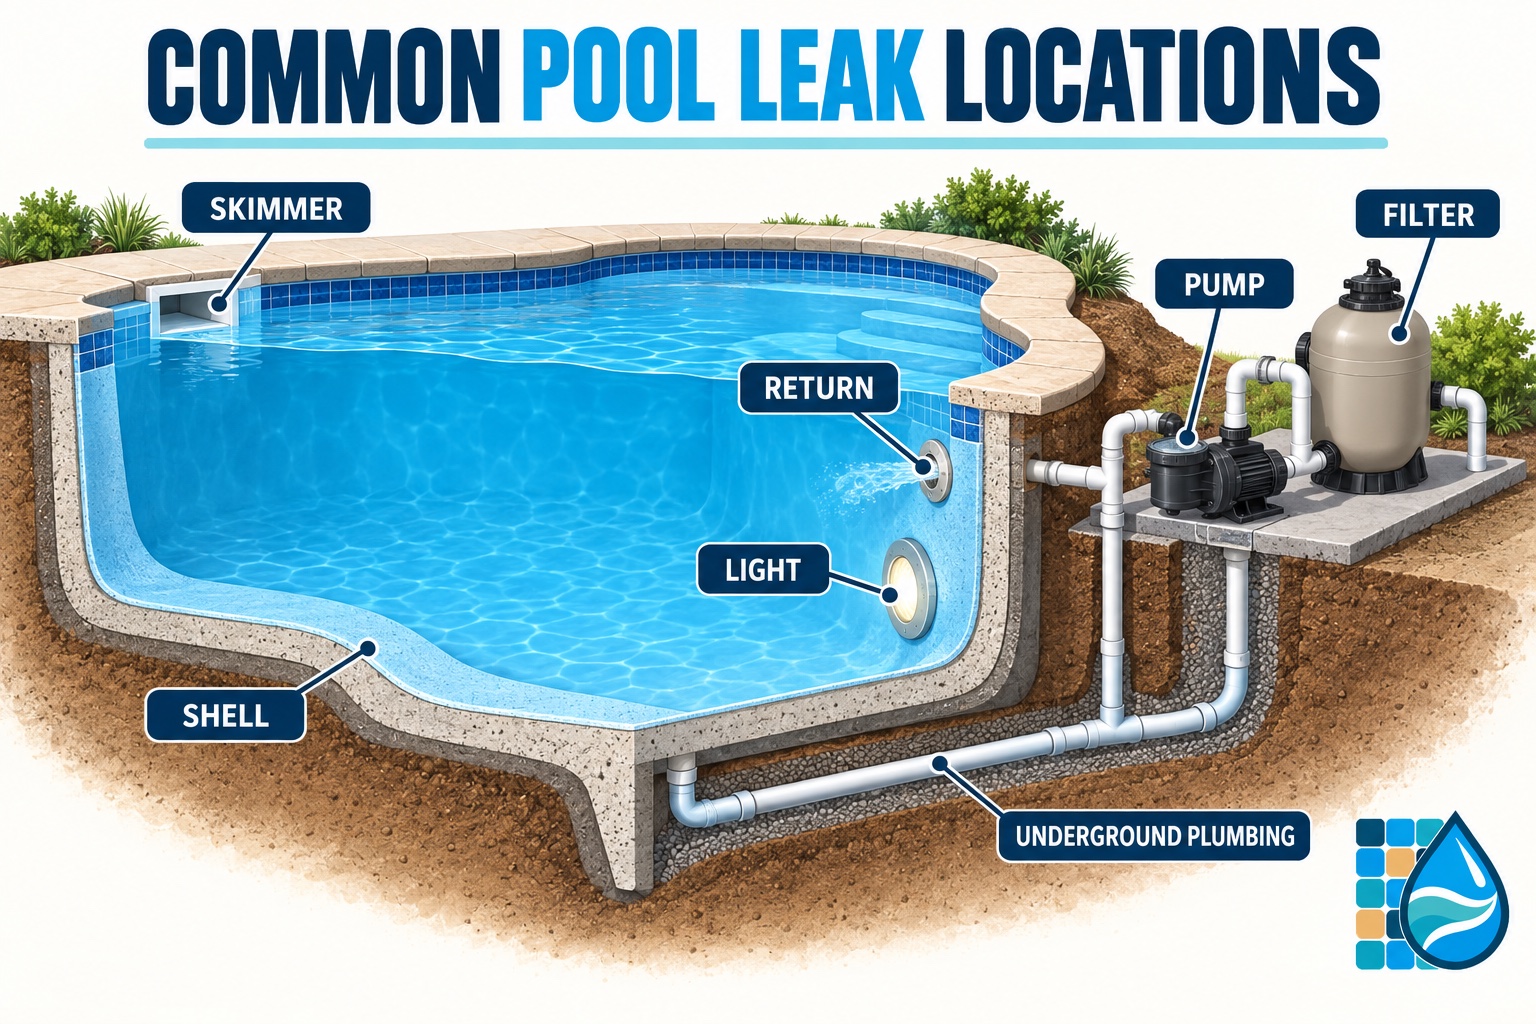
| Water repeatedly stops at one height | Leak may be near that elevation | Skimmer throat, tile line, return fitting, light niche, liner, or shell at that level |
How to Do a Pool Bucket Test
If you are asking “is my pool leaking?”, this is the most practical first comparison. The method follows EPA WaterSense guidance; use the same water in both places so temperature and chemistry are comparable.
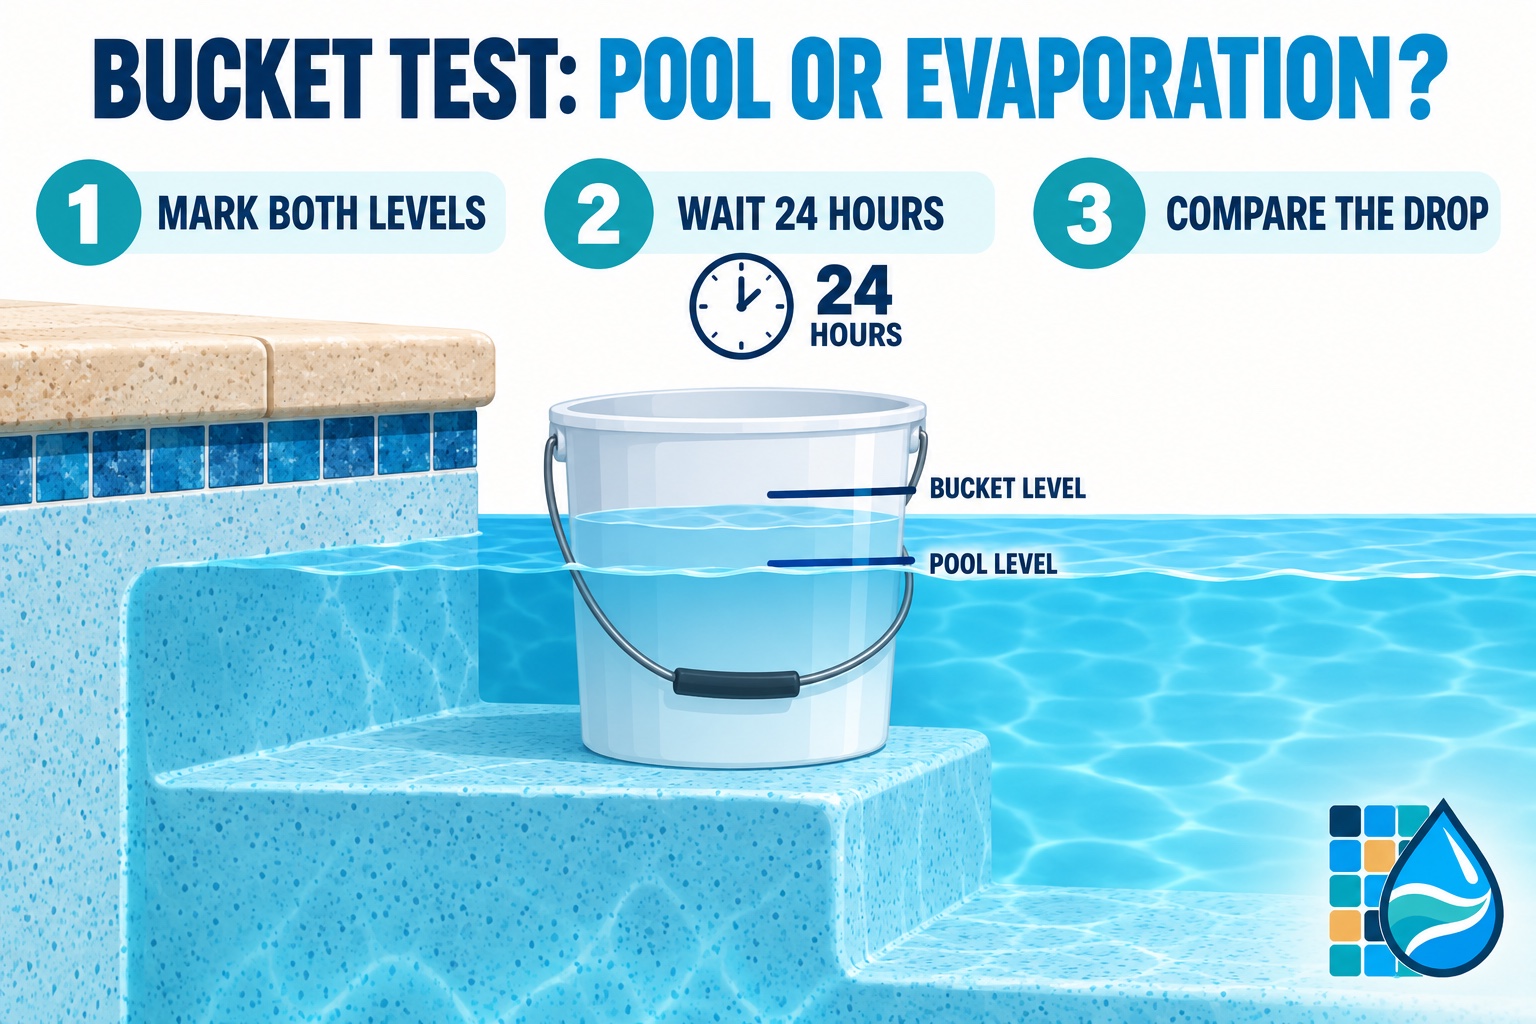
- Choose a calm, rain-free period. Avoid a day with heavy wind, swimmers, irrigation overspray, or predicted rain.
- Bring the pool to its normal operating level. Do not overfill it.
- Disable the automatic fill and stop added water. Confirm that no hose, water feature, overflow, cleaner, or backwash/waste line will change the result.
- Place a 2.5- to 5-gallon bucket on a step or bench. Add pool water and keep the bucket stable with much of it submerged. Do not create a trip, entrapment, or tipping hazard.
- Mark both starting levels. Mark the water inside the bucket and the pool water outside it, or measure each from a fixed reference point.
- Leave the setup undisturbed for 24 hours. Keep people and pets out of the pool. Follow the equipment manual if any system is taken out of its normal schedule.
- Compare the drops. If the pool lost more than the bucket, document the difference and begin a location-focused inspection.
A single test can be distorted by rain, splash-out, a refill valve, or a changed pump schedule. Repeat an unclear result under comparable conditions before paying for invasive work.
A Real Service-Call Lesson: a Nearly Invisible Skimmer Crack
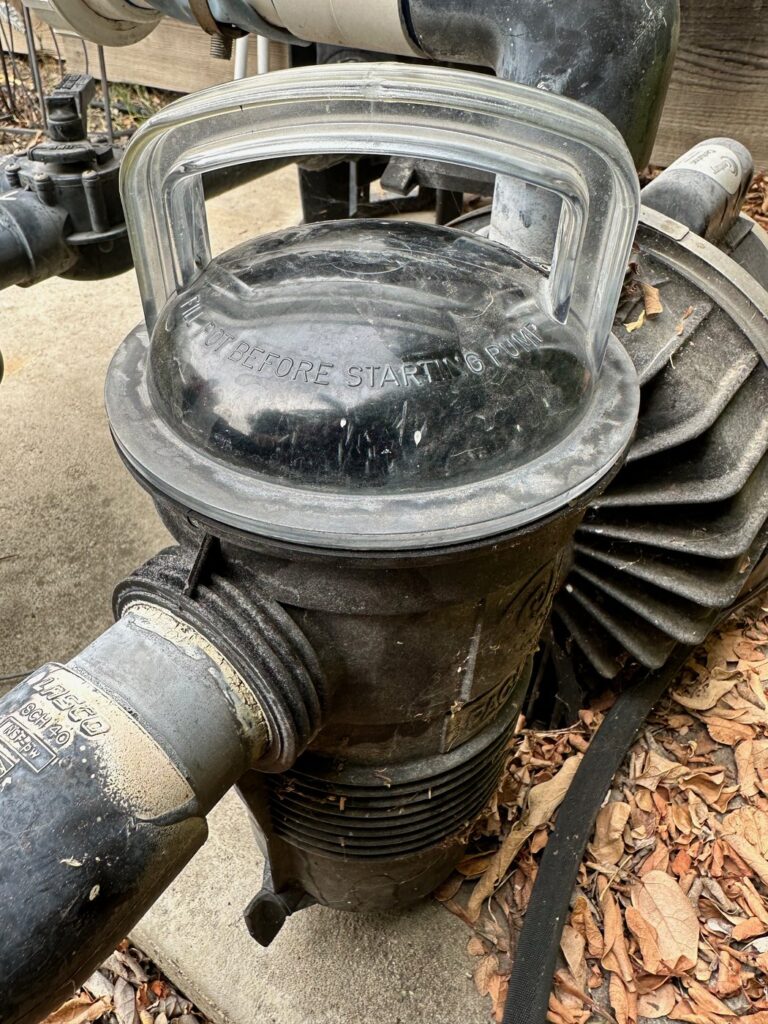
A homeowner asking “is my pool leaking?” can miss a very small failure. One difficult service-call diagnosis turned out to be a crack in the plastic skimmer housing. It was very hard to see, but enough water was escaping through it to make the loss noticeable.
Once we identified the skimmer housing as the problem, it was replaced—and that solved the issue. The lesson was not that every unexplained loss comes from the skimmer. It was that a small waterline failure can be difficult to see and still waste a meaningful amount of water. If the loss repeatedly stops near the bottom of the skimmer opening, inspect that area carefully without prying brittle plastic. The pool-skimmer troubleshooting guide explains related flow symptoms.
7 Signs Your Pool May Be Leaking
- The pool loses more water than the bucket. This is the clearest homeowner-level comparison because both water surfaces experience similar weather.
- The automatic fill runs more often. A fill valve can hide water loss. It can also malfunction or send excess water to an overflow, so inspect both functions.
- There are persistent wet or soft areas. Look around the equipment pad, plumbing route, pool perimeter, retaining walls, and downhill areas. Irrigation and drainage can create similar signs.
- Air enters the circulation system. Persistent bubbles in the pump strainer or returns may point to a suction-side air leak or a water level that is too low. Use the Pool Equipment Glossary to identify the pump, valves, filter, and return side.
- Water or mineral residue appears at the pad. Check pump seals, unions, valve stems, filter clamps, heater connections, and visible pipe joints. Never open equipment while it is pressurized.
- The water level repeatedly stabilizes at one elevation. The leak may be near a skimmer, return, light, step fitting, tile-line crack, liner opening, or shell penetration at that height.
- The pool needs repeated top-offs without a matching weather explanation. Track inches, not just hose time. Refilled water can also change chemistry, so confirm the water balance with the pool-water testing guide.
What Pump-On and Pump-Off Results Can Tell You
After a positive bucket test, a professional may compare loss during controlled pump-on and pump-off periods. The City of Chandler describes this as a way to narrow the search. Greater loss while the pump runs can point toward a pressure-side pipe, return, filter, heater, valve, union, or waste-line problem. Loss that continues with the system off can point toward the shell, liner, skimmer, fitting, or another static leak.
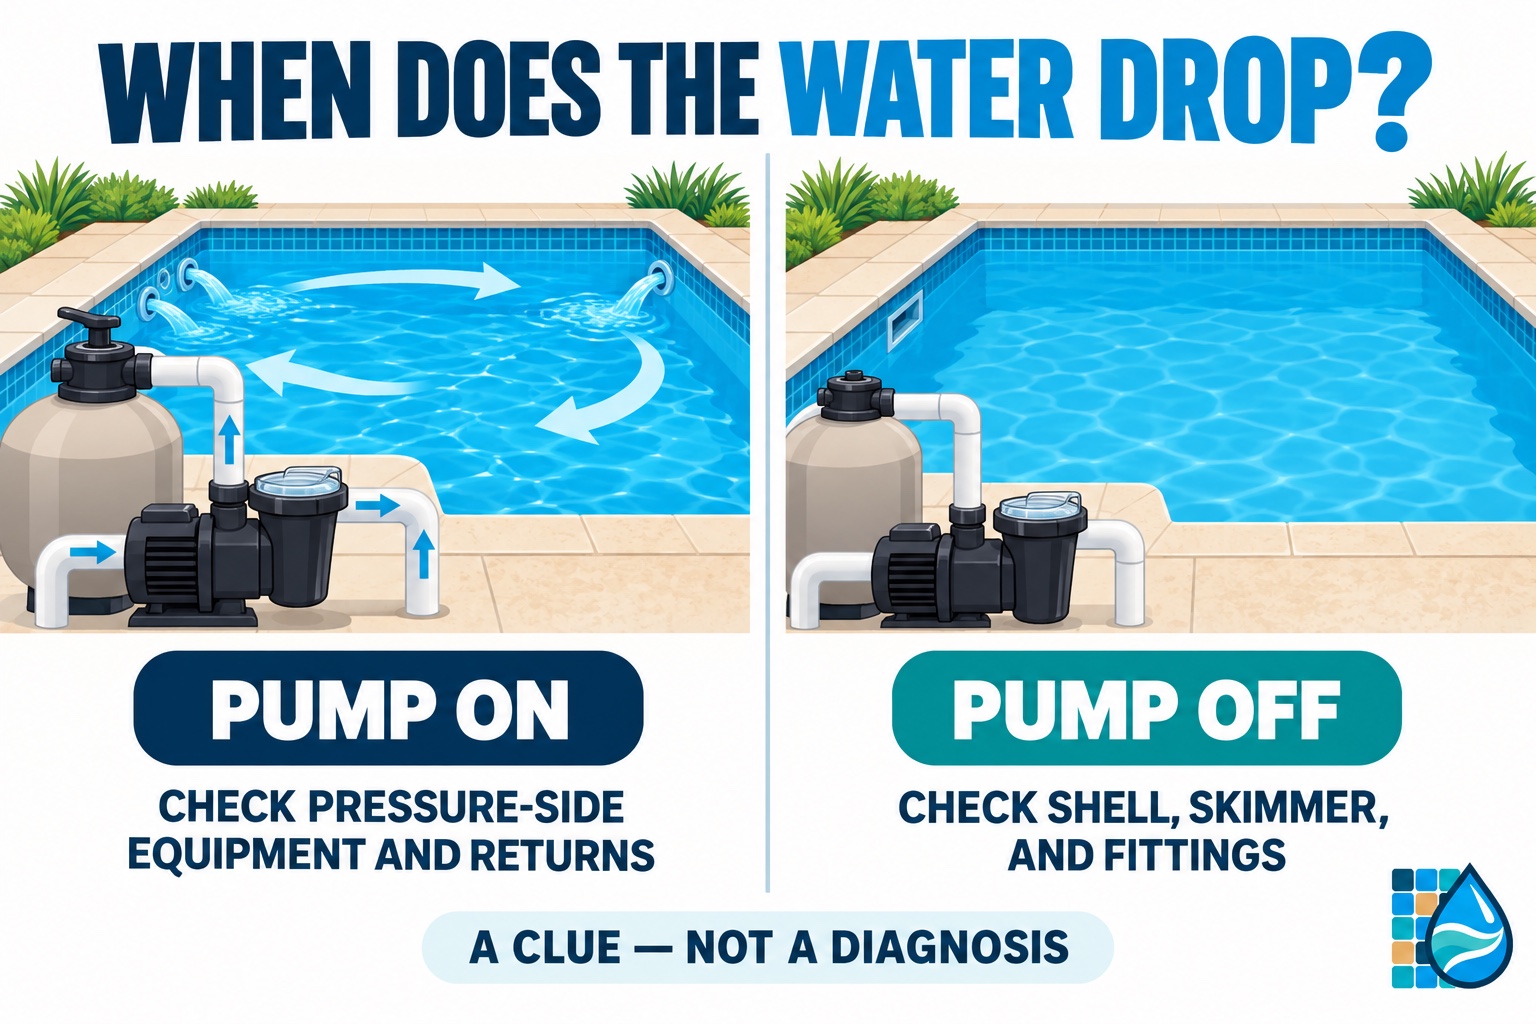
Treat this pattern as a clue, not a verdict. Some leaks behave differently as soil shifts or pressure changes, and a suction-side leak may pull air while the pump runs without visibly spilling much water. Never shut off freeze protection, required sanitation, or essential circulation merely to perform a test. Do not run the pump if the water level is too low to keep it primed.
Safe Checks by Pool Area
If the bucket test still leaves you asking “is my pool leaking?”, use these safe visual checks to narrow the possibilities without opening, removing, or draining anything.
At the Equipment Pad
With the system operating normally, look without opening anything. Check for active drips, damp unions, spray, puddles, rust tracks, or white mineral deposits. Note whether water appears only when the pump starts, at higher speed, during heating, or after shutdown.
At the Skimmer and Waterline
Inspect the skimmer throat, housing, faceplate, tile line, and nearby shell for visible gaps or cracks. A low level can also cause skimmer air and weak circulation; if clarity changes during the investigation, use the cloudy-pool-water diagnostic.
At Returns, Lights, Steps, and Fittings
Look for loose trim, separated sealant, liner movement, stains, or debris repeatedly drawn toward one location. Do not remove a light, cover, drain component, or wall fitting while the pool is filled unless the manufacturer and a qualified professional direct the procedure.
At the Autofill, Overflow, and Waste Line
Make sure the automatic fill actually closes and is not masking a leak. Confirm that water is not continuously entering an overflow. Check the visible waste or backwash discharge for flow when the valve should be closed. Valve service must follow the exact equipment instructions.
When to Call a Pool Leak Professional
If safe checks do not answer “is my pool leaking?”, stop there and bring in a qualified specialist rather than dismantling equipment or draining the pool.
Call a qualified leak-detection or repair professional when the pool loses more than the bucket, the level is dropping rapidly, the ground or structure is becoming wet, a concealed pipe is suspected, the pump cannot stay primed, or the source remains unclear after safe visual checks. Specialized work can include pressure testing, acoustic listening, dye testing, plugs, cameras, and structural assessment.
Do not let a suspected leak lower the water below the safe operating level for the pump or expose a pool finish that should remain submerged. Do not drain the pool to investigate. Groundwater pressure, soil conditions, hydrostatic relief, liner movement, and the pool’s construction can make draining dangerous and expensive.
Is My Pool Leaking? Common Questions
How much pool water loss is normal?
There is no reliable universal number because weather, water temperature, cover use, splash-out, and water features vary. EPA guidance says a loss greater than about two inches per week—or three inches in hot, dry areas—can indicate a leak, but a same-weather bucket comparison is usually more useful for one specific pool.
Can an automatic fill hide a pool leak?
Yes. It can quietly replace lost water and turn a level problem into a high water bill. Turn it off during a controlled leak test, then confirm that the valve closes properly and the overflow is not carrying away water.
Why does my pool lose water only when the pump runs?
That pattern can suggest a pressure-side or equipment leak at a return line, filter, heater, valve, union, or waste line. It is a starting point for inspection, not a conclusive diagnosis.
Should I use leak-detection dye myself?
Dye can sometimes help at an already-suspected, accessible location when the water is still and the product instructions are followed. It is not a practical way to search an entire pool, and homeowners should not remove energized lights or drain covers to use it.
The Bottom Line
If you are asking, “Is my pool leaking?” compare the pool with a bucket before relying on a generic evaporation estimate. Control the test conditions, document the loss, inspect safe and visible areas, and use the pattern to narrow the next step. Early diagnosis can save water and prevent a small equipment, skimmer, or structural problem from becoming a larger repair.
Sources and Review Notes
Written and field-reviewed by Chris Barnes. Former Northern California pool-service company owner with more than seven years of residential and commercial experience. Last reviewed September 8, 2026. Equipment manuals, product labels, building requirements, and applicable local rules take priority.