
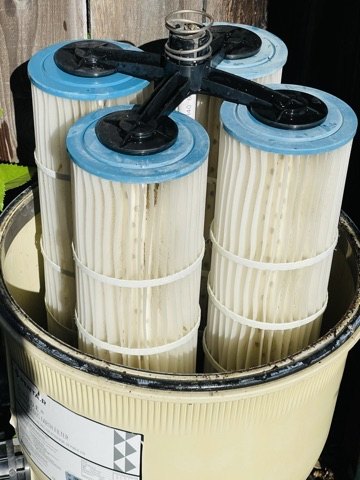
Cartridge filters do a great job of catching fine debris without a backwash valve—but their pleats gradually load with oils, pollen, algae, and dirt. The mistake is waiting until circulation has already suffered. This guide shows you how to clean cartridges safely, what to inspect while they are out, and the signs a filter set has reached the end of its useful life.
Start with safety
Turn the pump off at the timer or breaker. Open the filter’s air-relief valve, confirm the pressure gauge reads zero, and follow the manufacturer’s lid-opening procedure. Never loosen a clamp or open a pressurized filter.
Know your clean-pressure baseline
After a full cleaning or cartridge replacement, record the normal running pressure. That number is your baseline. In most systems, it is time to inspect and clean the cartridges when the pressure rises about 20–25% above that baseline. Heavy pollen, wind, leaf fall, algae recovery, and high bather load can make that happen much sooner.
How to clean pool filter cartridges
- Remove and inspect carefully. Before hosing anything down, look for tears, collapsed pleats, broken bands, cracked end caps, and damaged center cores.
- Rinse from top to bottom. Use a regular garden-hose nozzle at an angle and work between the pleats. A pressure washer can damage the media, so leave it out of the process.
- Clear debris from each fold. Take your time around the tight spots where leaves, pollen, oils, and algae residue settle deepest.
- Reassemble with care. Clean the housing O-ring and use only the lubricant recommended by the manufacturer. Make sure the lid or band is seated correctly before restarting the system.
- Check pressure and leaks after restart. Note the new clean pressure and watch the equipment for several minutes.
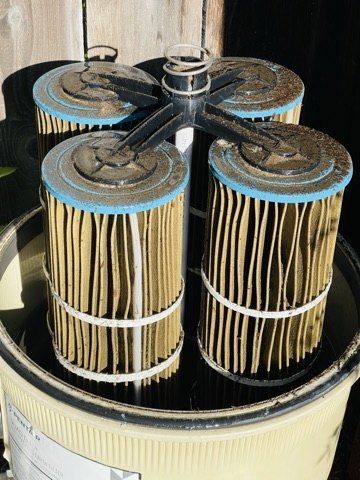
From the field: When a cartridge is past saving
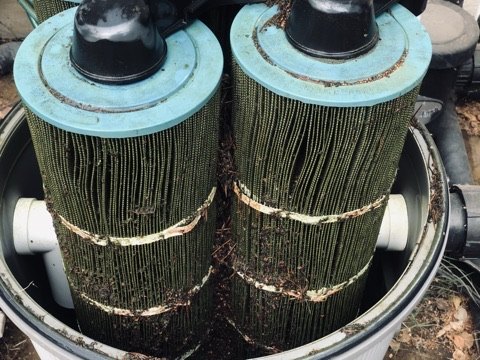
When I was called out to clean a filter for someone who was not already a service customer, I was often looking at cartridges that were beyond their useful life. Before deciding whether cleaning was worthwhile, I checked two things: whether the pleats were bowed, wavy, or collapsed, and whether the support bands were still intact. If the pleats had lost their shape or the bands were broken, replacement was usually the right call. Continuing to clean damaged cartridges can restrict flow, raise filter pressure, and put unnecessary strain on the rest of the equipment.
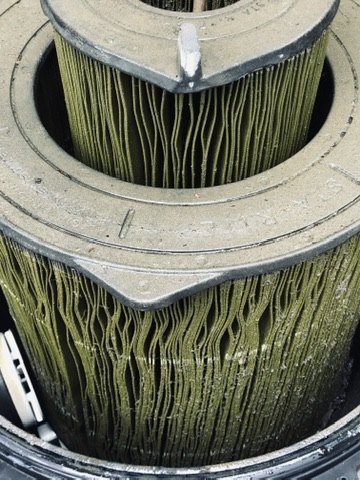
What the before-and-after photos show
A cartridge can look merely dirty from the outside while debris is packed deep in the folds. The most heavily fouled set below shows why regular maintenance matters: biological growth and organic material load the pleats, restrict circulation, and can make water problems harder to solve. A rinse can restore a serviceable filter, but it cannot repair damaged media.
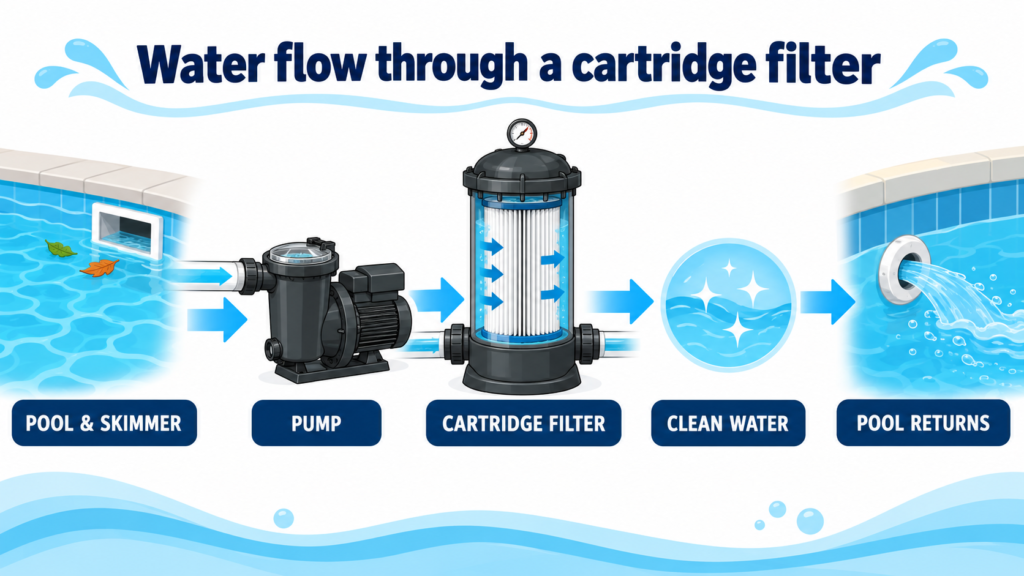
How water moves through the filter system
Understanding the order of flow helps make filter symptoms easier to diagnose: water leaves the pool through skimmers and drains, travels to the pump, passes through the cartridge filter, and returns to the pool. A restriction anywhere along that route can show up as higher filter pressure, reduced return flow, or poor water clarity.
Avoid the expensive mistake
Waiting too long to clean a filter forces the pump to work against extra resistance. If the pleats are warped, the support bands have broken, or the media is torn, replacement is a smarter choice than repeatedly trying to clean a cartridge that cannot flow correctly.
Quick cartridge-filter checklist
- Turn the pump off and verify pressure is at zero.
- Remove and inspect every cartridge before cleaning.
- Rinse gently—do not pressure wash the pleats.
- Record your clean-pressure baseline after reassembly.
- Replace cartridges with bowed, wavy, collapsed pleats or broken bands.
- Check for stable pressure and leaks after restarting.
Need help identifying a filter problem? Ask Chris About Your Pool.